How to Build a WooCommerce Store – Step-by-step Guide
We have recommended WooCommerce many times already, as we believe it’s one of the best tools to build online stores. WooCommerce is a free plugin for WordPress sites, but the cost is not its only advantage. Entrepreneurs that choose WooCommerce, can be sure that their stores will be easy to manage, with great design and fully secure. What’s more, the websites will be technically efficient and their owners will be able to count on WooCommerce support in any problematic situation.
How does WooCommerce work?
WooCommerce is a plugin for websites built on the WordPress platform which adds an online shop to the page. WooCommerce allows you to sell physical products, services or digital products. The plugin provides pre-built templates and a shop structure with all the necessary pages and tools. Everyone can start their own business, even without IT knowledge and skills.
Today we explain how to create a basic, functional online shop with WooCommerce. Thanks to our guide, you’ll not only be able to take your first steps in the world of e-commerce, but you’ll also see that WooCommerce is indeed an easy to use and effective tool.
*
You already have an e-commerce store and you want to promote it?
*
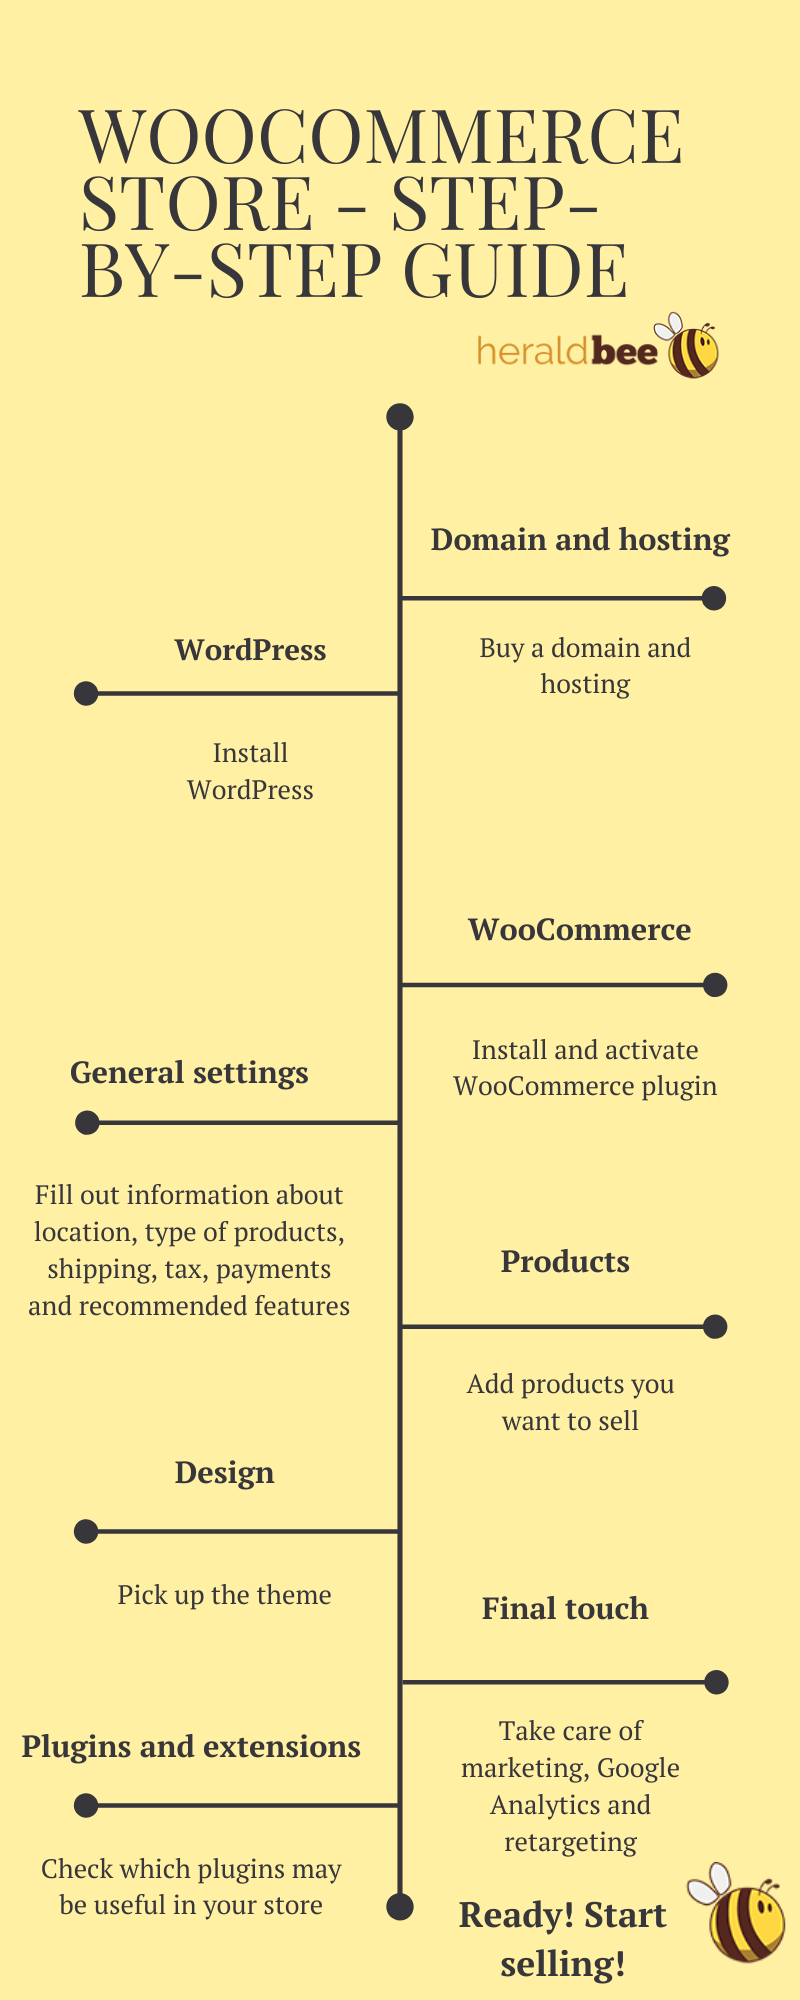
How to build an online shop with WooCommerce?
1. First steps – domain and hosting
Domain and hosting are two things you have to deal with before you start working with WordPress and WooCommerce. When choosing them, it’s worth paying special attention to the costs, security and capabilities of the server. An e-commerce store can weight a lot as a website, so it is important to make sure that the hosting you decide to use will be able to handle it at any time. It’s very discouraging for customers when they see the page loads slowly or doesn’t work at all.
2. WordPress
As we mentioned before, WooCommerce is a plugin for pages on WordPress. Therefore, the second step is to install the WordPress platform. After passing this stage, you will be a proud owner of your own website. Completely empty, but that’s already something!
3. WooCoomerce installation
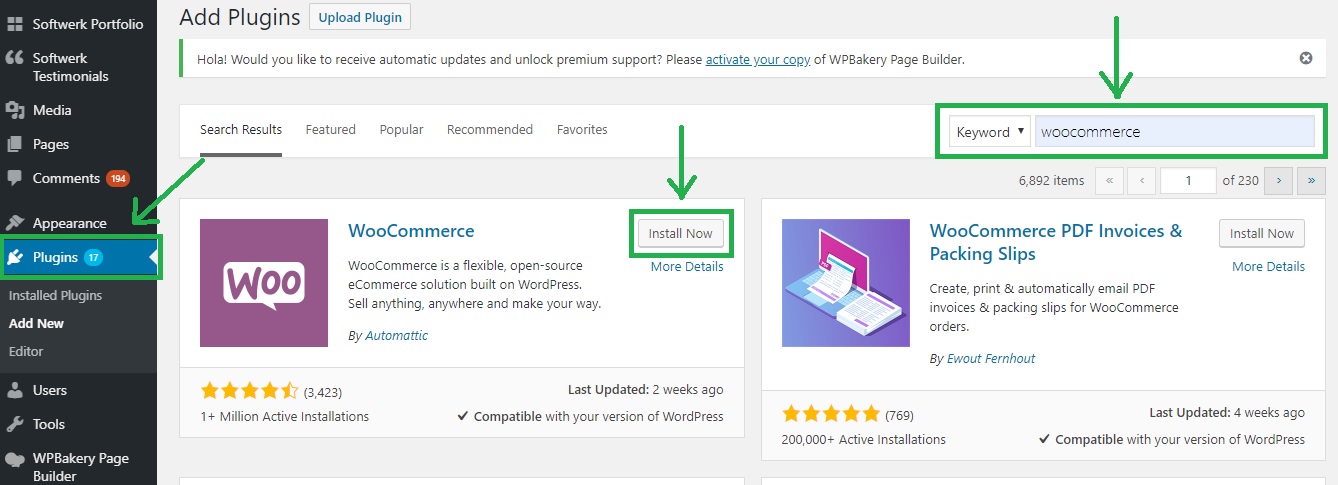
At this stage, it’s time to move on to the steps strictly related to WooCommerce. In your WordPress admin panel click on the Plugins section, then find the WooCommerce plugin and install it.
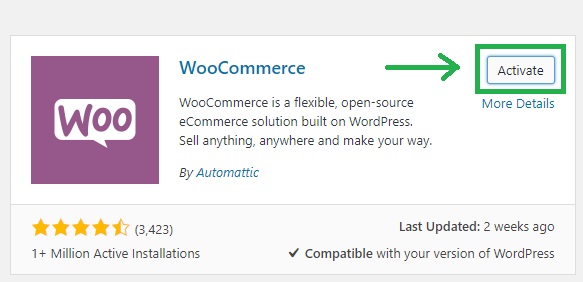
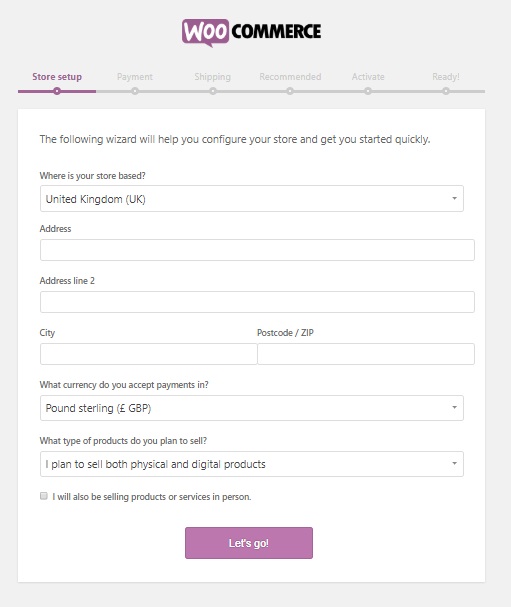
After installation, the Activate button will appear. Clicking on it will automatically move you to WooCommerce Wizard – your help in the activation process.
You need to go through the basic, mandatory settings such as the location and currency of the store, shipping, taxes and payments, as well as the settings recommended by WooCommerce.
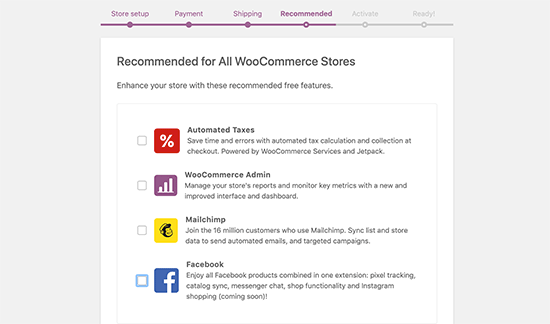
The Recommended section is just a list of a few of the free features that you can enable in your shop and that WooCommerce finds useful.
✓ Take a particularly close look at the tax section, and if you’re not sure what to do, read this WooCommerce guide.
✓ When it comes to payment methods, in addition to the decision on the payment gateway, it’s also worth taking care of the SSL certificate. The security of payment is a very important matter for customers.
4. Products
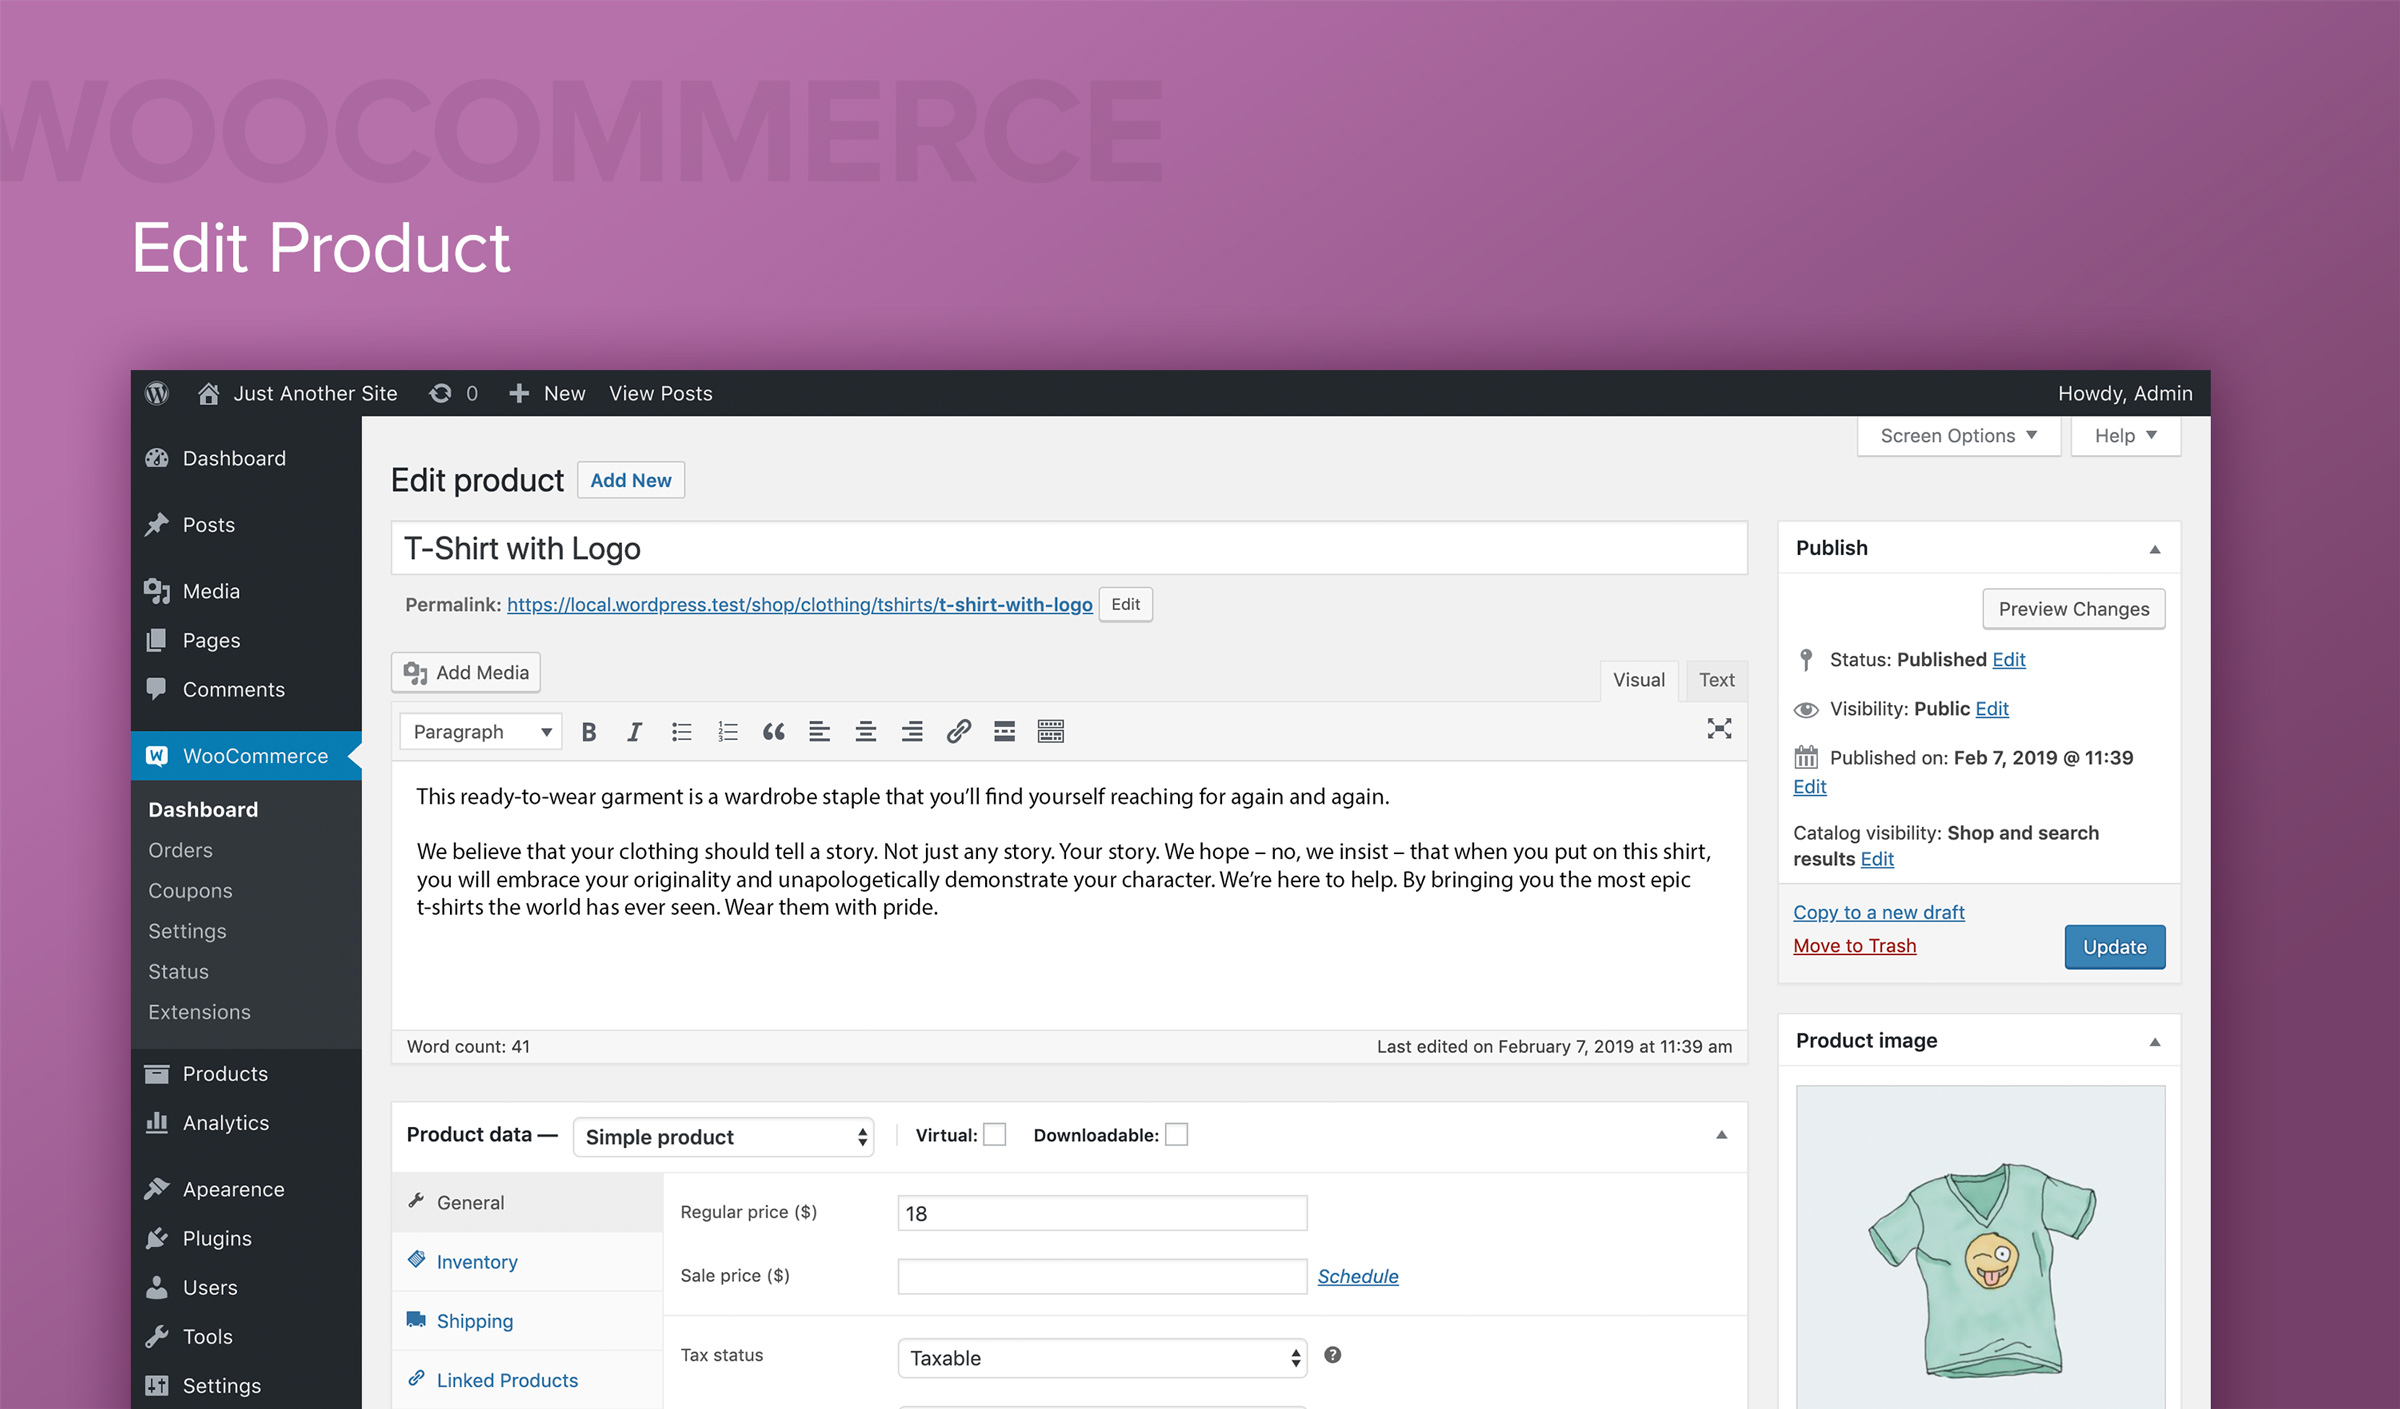
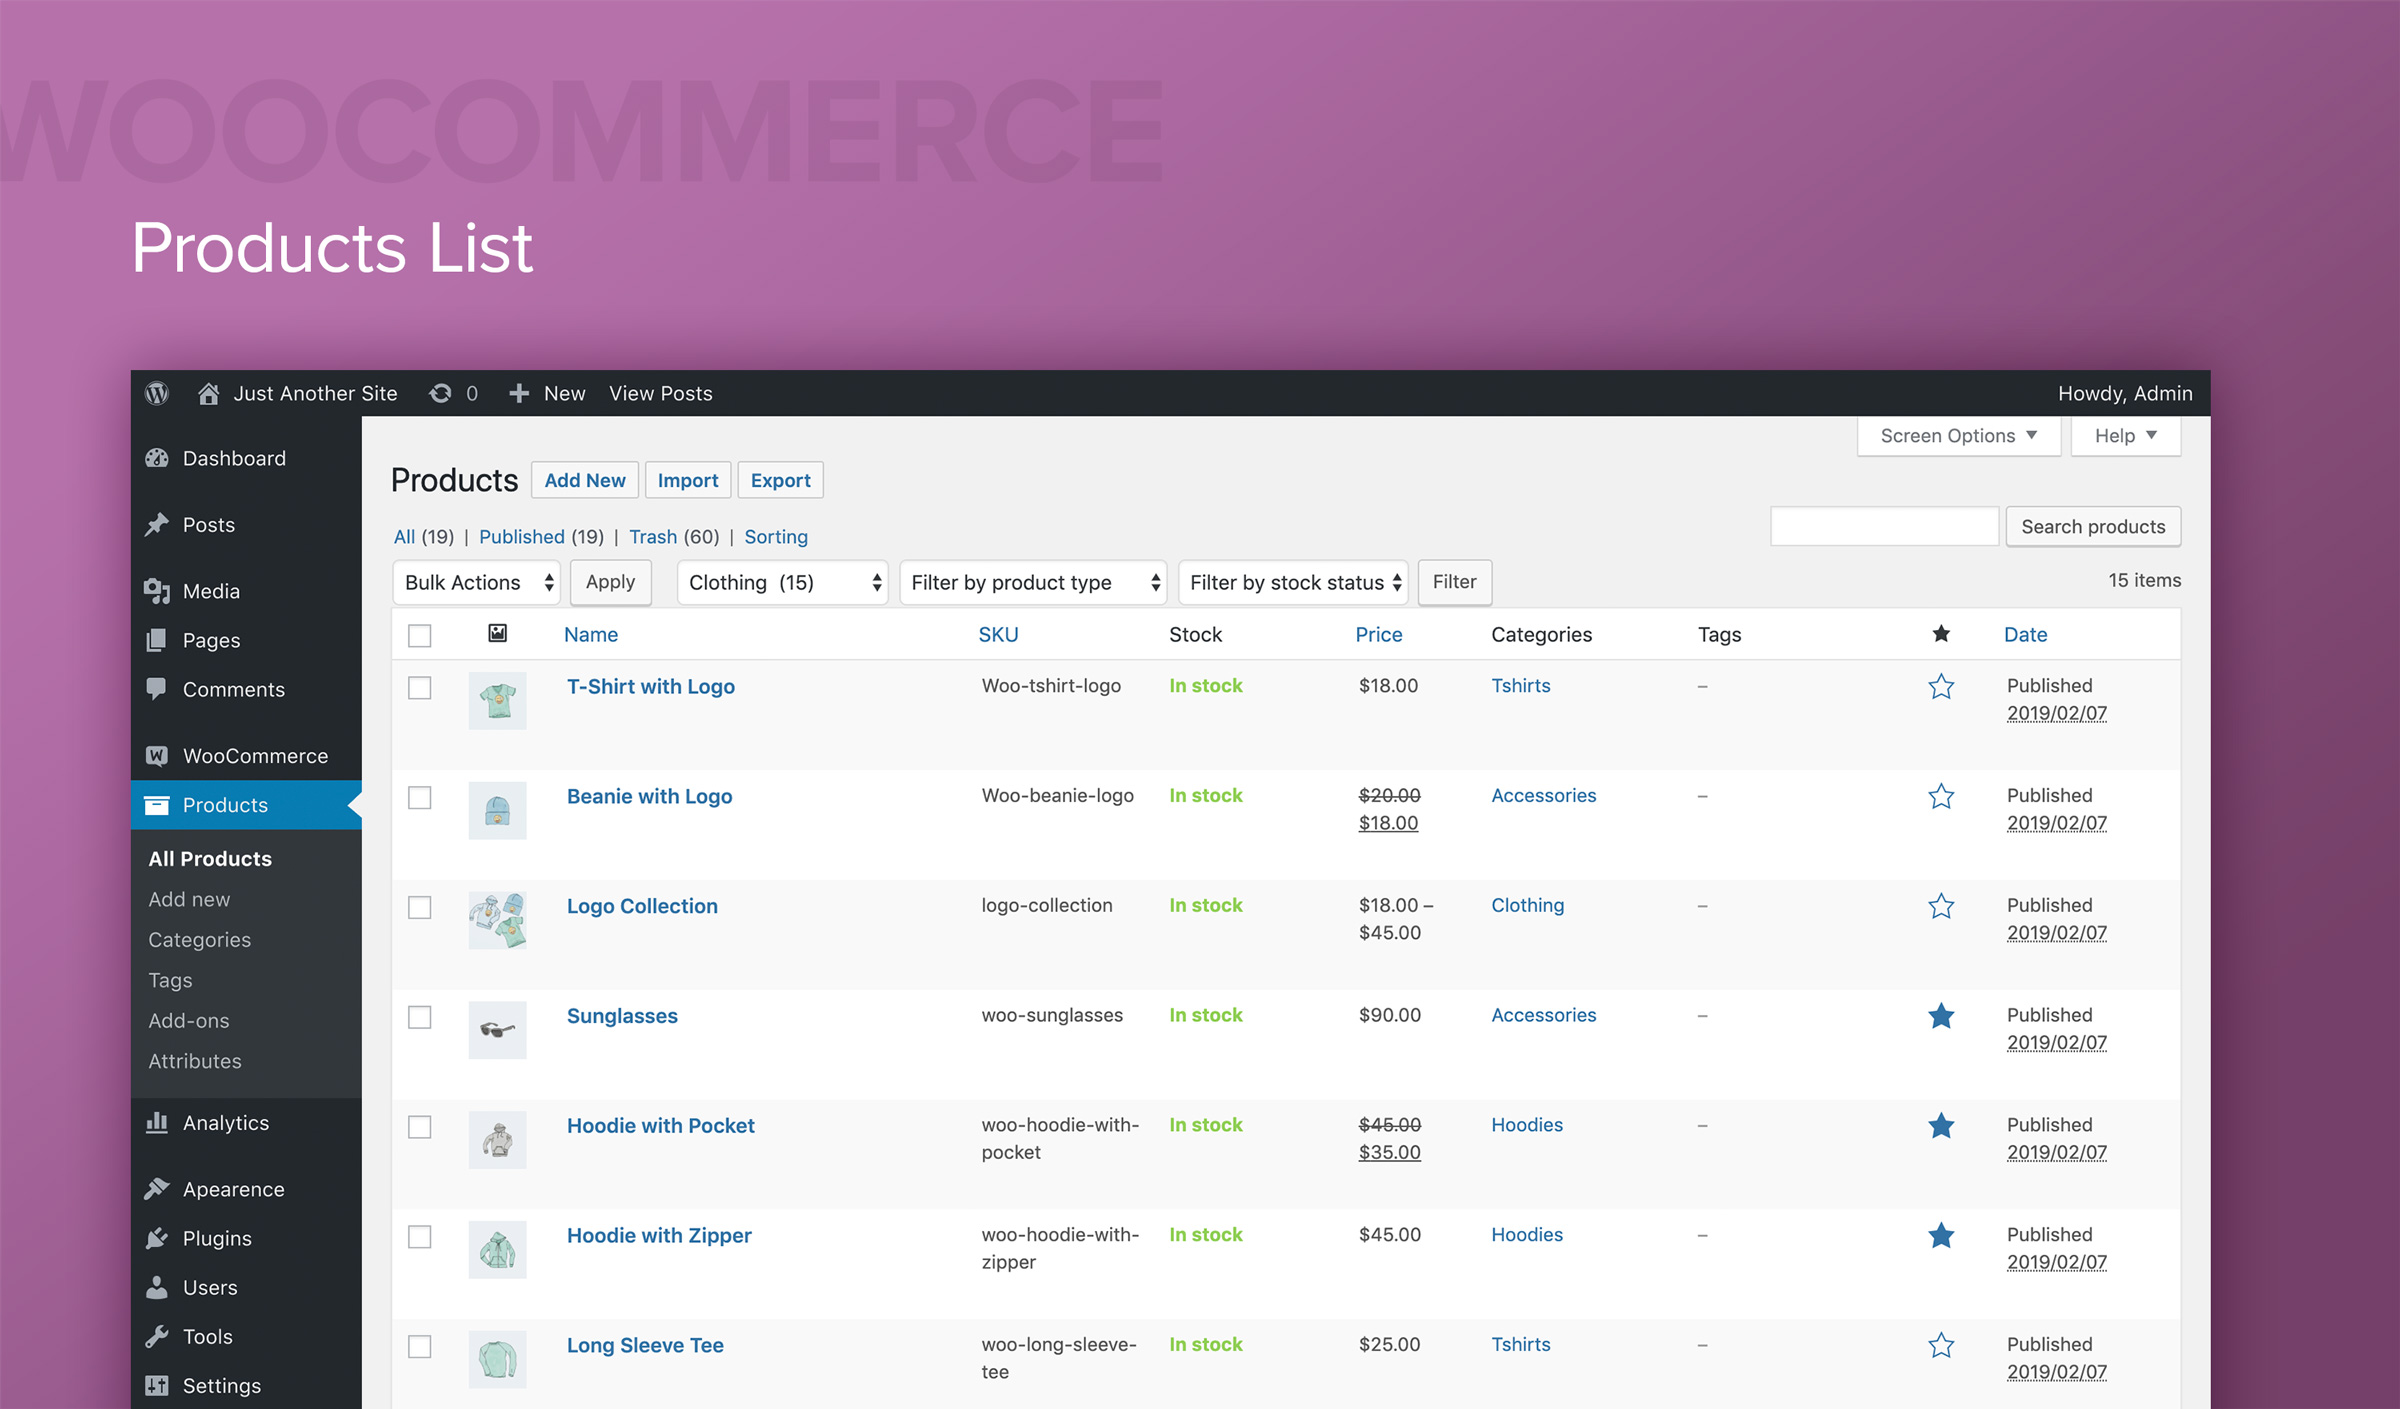
The shop cannot operate without products for sale, so it’s time to add them to the website. From the left-hand menu in the administration panel of WordPress, select the Products tab and click Add new. For each new product, you need to add a title, a description and some photos, as well as information about the price, delivery terms and stock. As soon as the product page is ready, click Publish.
✓ It is very important that you complete all the product data carefully. Customers appreciate the completeness of the information and are more willing to buy products about which they can learn as much as possible.
✓ Also, remember to tag your products. Customers can later filter them and find what they need faster. It improves user experience.
5. Design
Right after adding the products, it’s the best time to choose a shop theme. Only when you see the product pages will you be able to judge which template suits you best. WooCommerce and WordPress offer a wide range of themes, both free and paid. The choice is up to you and depends on your preferences and taste. If you need advice, check out some of the best patterns here. The list is based on users’ feedback, so might be useful.
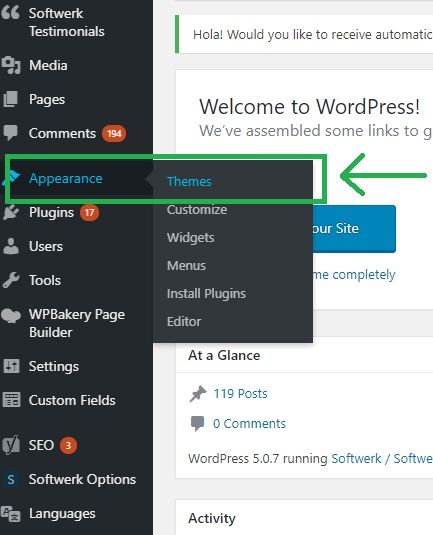
Themes can be found, added (by clicking Add new) and activated (by clicking Activate) in the Appearance section in the Themes tab.
6. Final touch
To be fair, after the previous steps, the online shop is ready to sell. However, we have a few more tips to help you improve its functionality.
✓ Take care of marketing and the proper advertising of products.
✓ Activate Google Analytics to collect data about customers and their behavior from the very beginning of the store’s existence and adapt your business to their needs.
✓ Create a system of collecting e-mail addresses of potential customers (e.g. newsletter), as well as think about starting a retargeting campaign. Thanks to these actions, the conversion rate will surely increase.
7. Plugins and extensions
One of the main advantages of WooCommerce is the possibility to enrich the shop built on this platform with countless plugins, both free and paid. Plugins and extensions are not an obligatory element of the e-commerce store, but undoubtedly have a very positive impact on its appearance and functionality. They also improve customers’ shopping experience. Therefore, we encourage you to check which plugins could be useful in your store. We recommend especially:
✓ Plugins related to shipping
✓ Plugins to integrate payment gateways
✓ Marketing plugins
We also encourage you to try the Heraldbee application, which you can use thanks to the plugin for the WooCommerce store. With Heraldbee you can easily automate your Google Shopping campaigns and reach more customers. We can also help you build, manage and promote your online store. If you need someone to help you create an e-commerce shop, also with WooCommerce, don’t hesitate to contact us!
So, are you ready to start your adventure with e-commerce and WooCommerce?
*
Do you need help with advertising campaign?


