How to Implement a Conversion Tracking in the Shopify Store
Google Shopping Ads are one of the most important tools for online advertisement. The number of retailers promoting their products via Google Shopping Ads is growing systematically. There are also many companies showing the satisfying results they achieved after including this type of ads into their marketing strategy. But have you ever wondered how to measure the results of Google Shopping campaign? In one of the last Google Shopping Articles Roundups, we have recommended an article by Mark Irvine from WordStream, about the important benchmarks to follow in Google Shopping Ads. Of course one of them is the average monthly budget, but there are other important ones, like the average click-through rate, the average cost per click, the average cost per action or the average conversion rate. Let’s focus on the last indicator today – conversion.
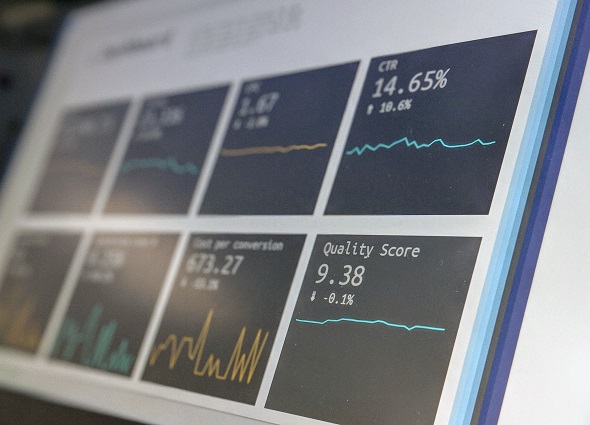
After creating a Google Shopping campaign, there are many benchmarks to observe
What is conversion in Google Shopping Ads world?
Conversion, in general is what every online advertiser wants – a click which ends with the action desired for the business. It may be a call, an email sign-up, download or, in case of Google Shopping Ads, a purchase. Every time a customer sees the ad, clicks it and, encouraged by the ad, buys a product, a conversion happens. It’s the main reason for creating Google Shopping Ads.
Why is conversion tracking necessary?
It’s highly recommended to track the conversion rate while running a Shopping Ads campaign. Every campaign owner should monitor how many conversions happen thanks to the active ads and which of them generate the most conversions. Such a review should be conducted regularly. Depending on the observations, the campaign’s budget (bids), negative keywords, groups, etc. should be adjusted accordingly. It will optimize the campaign and increase the return on investment.
*
Do you help with promoting your business online?
*
How to track the conversions in the Shopify store?
Google Ads provides a conversion tracking tool. It’s free for Google Ads users and allows them to track the actions of customers on the website after clicking the ad. It’s also possible to implement it in the Shopify store, the only requirement is to have a Google Ads account with an active campaign.
How to do it? There are three steps to perform – create a conversion action, install the global site tag (gtag) and add the event snippet. See below all the details. The final result of those actions is a basic conversion tracking – it only measures transactions and their value. We suggest starting with this solution.
Creation of the conversion code
✓ In the tools in Google Ads account, click Measurement and then Conversions.
✓ Click the plus button, then Website.
✓ In the Conversion name add the name for the conversion you’d like to track. It will be later visible as such in the analytics report. You can name it for example “Heraldbee”.
✓ From the Category drop-down select the appropriate one, in this case, “Purchase/Sale”.
✓ From the Value select how to track the value of each conversion. We suggest choosing the option “Use different values for each conversion”. This setting allows for counting the value and doesn’t assign any if something goes wrong.
✓ Next, in the Count select how to count these conversions. We suggest to set it up for “Every”.
✓ When it comes to Currency, choose the currency of your shop and the advertisement account.
✓ Click the Conversion window. This is to decide how long to track conversions after an ad interaction. It can be 1 to 90 days. 30 days is a default choice.
✓ Click View-through conversion window. This is to decide how long to track view-through conversions. The window can be 1 to 30 days. 1 day is a default choice.
✓ Click Include in Conversions. This setting is selected by default and serves for including data for this conversion action in the Conversions reporting column.
✓ Click Create and Continue.
✓ Important note: in case of the bulk action, we recommend using API to create a new conversion event for a specific account.
Installation of the global site tag
✓ In the Set up the tag step in Google Ads, click Install the tag yourself.
✓ In the Global site tag section, select the appropriate option. The global side tag will be generated accordingly.
✓ Copy your global site tag.
✓ In another browser window, open your Shopify admin and click Online Store.
✓ Click Actions and then Edit code.
✓ Open your theme.liquid file.
✓ If this is the first time you’ve installed a global site tag, then paste the copied global site tag between the <head> and </head> tags to apply the tag to every page in your store
✓ Click Save.
Installation of the event snippet
✓ In Google Ads, from the Event snippet section, select Page load.
✓ Copy the event snippet code, see how it looks like below.
Here’s a version if you want it to track the conversion after making a transaction, with a thank you page:
{% if first_time_accessed %}
<!-- Event snippet for Purchases - Heraldbee conversion page -->
<script>
  gtag('event', 'conversion', {
      'send_to': 'AW-XXXXXXXXXX/zzzzzzLABELzzzzzz',
      'value': {{TRANSACTION VALUE}},
      'currency': 'EUR',
      'transaction_id': ''
  });
</script>
{% endif %}
Here’s a version if you want it to track the conversion already after the click:
{% if first_time_accessed %}
<!-- Event snippet for Purchases - Heraldbee conversion page
In your html page, add the snippet and call gtag_report_conversion when someone clicks on the chosen link or button. -->
<script>
function gtag_report_conversion(url) {
var callback = function () {
if (typeof(url) != 'undefined') {
window.location = url;
}
};
gtag('event', 'conversion', {
'send_to': 'AW-XXXXXXXXXX/zzzzzzLABELzzzzzz',
'value': 0.0,
'currency': 'EUR',
'transaction_id': '',
'event_callback': callback
});
return false;
}
</script>
{% endif %}
Where:
zzzzzzLABELzzzzzz = conversion label for the created code
AW-XXXXXXXXXX = is the same ID as for the remarketing gtag.js (see below)
✓ In another browser window, open your Shopify admin and click Settings, then Checkout.
✓ In the Order processing section, in the Additional scripts text box, paste the event snippet. If you already have code in the Additional scripts text box, then add the event snippet on a new line below the existing code.
✓ The “{% if first_time_accessed %}.” at the beginning and “{% endif %}” at the end is to prevent counting reloading of the website as a new conversion.
✓ USD is a default currency, otherwise, it needs to be included in the snippet.
✓ The default transaction ID is blank. If you want to avoid recording duplicate conversions, include “'{{ order_number }}’” next to ‘transaction_id’
✓ Click Save.
Remarketing code
We recommend adding the remarketing code as well. It will make the ads visible for the customers who already visited the store’s website. See below the code for that. It needs to be installed on every website between the tags <head> </head>.
<!-- Global site tag (gtag.js) - Google Ads: XXXXXXXXXX-->
<script async src="https://www.googletagmanager.com/gtag/js?id=AW-XXXXXXXXXX"></script>
<script>
  window.dataLayer = window.dataLayer || [];
  function gtag(){dataLayer.push(arguments);}
  gtag('js', new Date());

  gtag('config', 'AW-XXXXXXXXXXX');
</script>
Where: AW-XXXXXXXXXX is the unique remarketing code identifier, assigned to the specific account.

Conversion tracking is an invaluable analytics tool
Summary
The whole process of the implementation of the conversion tracking in the Shopify store may seem complicated for rookie retailers. However, it’s worth the effort. Thanks to conversion tracking, they can be sure, that the budget for Google Shopping Ads is allocated properly and spent efficiently. Certainly, conversion tracking is an invaluable analytics tool.
Start your marketing campaign with Heraldbee!


